Wednesday, 26 August 2009

Charlotte Russe

My Mum’s birthday falls on the 8th August, right in the middle of our holiday in France and Spain. Whilst this meant she was lucky enough to enjoy sunshine and swimming pools on her birthday – there was no homemade cake! Now in family with bakers and cooks, there should ALWAYS be a homemade birthday cake. So once we were home, out came the recipes!
barcelona2 061 Before we had left, my Mum had noticed a gorgeous looking Charlotte Russe in the window of the patisserie Paul. Paul is a very fancy French bakery which has now spread its chains all over London as well as smaller branches at motorway service stations! Whilst the standard of baking there is very high, this sure pushes up the prices! The rather small (if beautiful) charlotte russe my Mum saw was practically £20! So, a homemade one it was definitely to be.barcelona2 057
A Charlotte Russe is essentially when you line a tin or bowl with sponge fingers, and pour in a “bavarois”. The bavarois in the recipe I followed was a custard thickened with gelatine, with whipped cream and raspberry puree stirred in – then refrigerated in the tin. We (my Mum & I) topped our russe with whole raspberries which we set with a raspberry glaze, but we thought that the raspberries looked prettier without. The exact origins of the charlotte russe is, as with many desserts, not 100% exact. It is either thought to be named after the British Queen Charlotte (1744-1818, wife of George III) or to have been invented by the French chef Marie Antoine Careme (1784-1833), who named it in honour of his Russian employer, as russe is Russian in French.barcelona2 067
You can find the recipe I followed here except I made a few alterations…..
Instead of four miniature desserts, I used one large tin. I found I needed 4 gelatine leaves to make the custard set properly, and I also used two packets of frozen raspberries for the mousse and bought extra fresh raspberries for the top. Although I just used shop-bought this time, the recipe also includes how to make your own sponge fingers, which would improve the dessert even more!
barcelona2 070
The charlotte russe involves quite a few steps, so I split it over two days – which is easy seeing how the bavarois needs at least 4 hours or overnight to set up well. I’m pleased with how the final product turned out and it looked so pretty waiting to be devoured! The rich raspberry mousse was delightfully offset with the crunchy sponge fingers, and the whole glazed raspberries added another dimension of sharp juicy goodness :) Whilst I wouldn’t rush to make this dessert again– it was a really good one to make as it was my first time using gelatine and a right show stopper!

Friday, 21 August 2009

The Markets of Barcelona

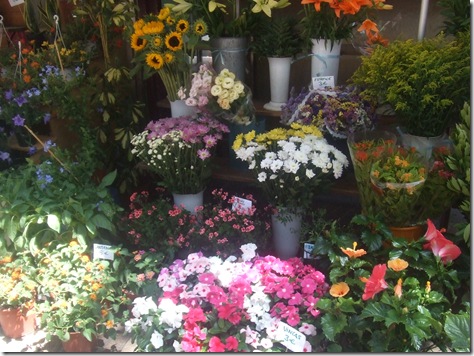
For a great start to our summer holiday this year, my family and I travelled to spend a few nights in the heart of Barcelona. Barcelona is a hugely varied, bustling city which has so much to explore. Just a couple of streets away from our apartment, was the huge street, La Rambla. On this was the indoor market: Mercat de La boqueria. Its a fabulous, thriving market, and here are some of the photos I took when we visited..enjoy!

barcelona2 009 barcelona 038barcelona 043barcelona 040 barcelona 048barcelona 073barcelona 070barcelona2 002barcelona2 015

barcelona2 034barcelona2 047 barcelona2 025

Saturday, 15 August 2009

Hokey Pokey Ice Cream!

Or, as it should otherwise be known…a bowl of pure joy :)

34Like a lot of bloggers around this time of year, the summer weather has not been perfect for turning on the oven and baking away like crazy (although I say that, but our British summer currently consists of plenty of showers!). Therefore, as I still like to while away the time in the kitchen: I turn to ice cream. And not just any ice-cream, hokey pokey ice cream!!

38 I don’t know if hokey-pokey goes by the same name in America or Australia, so basically it is honeycomb. Everyone knows honeycomb, right? Golden syrup+sugar=caramel. Mix caramel with baking soda, let harden – honeycomb! Pure sugar really, but so very good!

40After the honeycomb is hardened, you simply mix it with whipped cream and condensed milk and freeze. No churning or stirring needed – just chuck it in a box in the freezer until you want it. And my, will you want it! You could eat this mixture by the un-frozen spoonful [in fact I almost did :) ]

18

The delightful recipe was from this Thane Prince book, one I have not cooked from before but plan to experiment with more ice creams and recipes from it over the summer if they all turn out like this one! So honeycomb lovers: MAKE this ice cream! And even if you’re not, this may convert people with its rich and creamy glory :)

Honeycomb Ice-cream, from Simply Good Food by Thane Prince
This ice-cream does not need stirrings as it freezes.
Use within ten days.

5tbsps white sugar
2tbsps golden syrup
1tsp bicarbonate of soda
600ml (1pint) whipping cream
1 large tin condensed milk

1) Start with the honeycomb. Place the sugar and syrup in a saucepan and cook over a low heat until the sugar melts. Now boil rapidly until the caramel is a deep gold in colour.

2) Remove from the heat and sift over the bicarbonate of soda. Stir the frothy mixture, then pour on to a lined baking sheet. Allow to cool, then break into smallish chunks.

3) Whip the cream until floppy, then beat in the condensed milk. Continue beating until the mixture is quite stiff. Fold in the pieces of honeycomb plus any crumbs, then scrape into a freezer-proof bowl/box, and freeze for about 8 hours or overnight.

Wednesday, 29 July 2009

BBB: Bakers Blogoversary Battenberg!

It all started with a little conversation like this, exactly one year ago...
ME: I’d like a blog…when I’m older I’ll start my own blog.
SISTER:Why not just start one now?
ME: *long pause* Because I can’t!
SISTER: Why? You bake enough!
ME: *long pause*
A couple of hours and some pootling on Blogger later, Teen Baker was born!
20I can’t believe that it has been a whole year since I started, with my first bake of Welsh Cakes! Although I don’t want this to become a soppy speech, I do feel like I’ve come a long way in this one year! And I do want to thank all you readers who comment here because thats what keeps me going! Marie, Steph, Jessy, Ash, George – and everyone! Thank you – I hope Teen Baker has many more years to come :)
To celebrate my first blogoversary, I made a Blogoversary Battenberg :)
21
I’ve always liked battenberg cakes, even if purely for their pink and yellow checked prettiness. The thought of someone thinking, “hmm, if I dyed half my cake pink…and then stacked it checkerboard style..wouldn’t that be good?” just makes me smile :) In reality, the battenberg cake origin is not 100% certain but is thought to have been created in honour of the royal 1884 marriage between Queen Victoria’s granddaughter and the Prince Louis of Battenberg. The four cake squares in the cake are thought to represent all four Battenberg princes: Louis, Alexander, Henry, and Francis-Joseph.
14 Lots of desserts which look extra pretty often include extra hassle, extra work. Other than the final assembly, and perhaps one extra bowl – battenberg dispels this myth! Once you start investigating recipes and actually baking it: you realise how simple it is: just a sponge dyed different colours, layered and wrapped in marzipan! Proper layered sponge cakes are way more complicated because of the balancing act that goes on: with a battenberg loaf as long as the little rectangles of cake are even, the assembly is a pretty simple job.
28 I am proud of this cake and its checked glory – it tasted mighty good too :) I found the recipe here, except I used shop bought marzipan. This battenberg cake proves that again you can easily bake things which you normally buy! Hopefully its success is a good omen for the coming Teen Baker years!
PS. Im off on my summer holiday for two weeks now, but I have scheduled posts which should hopefully come up - including the most delicious ice cream, and part 2 of the chocolate museum!
30

Saturday, 25 July 2009

German Chocolate Museum! (1)

In the middle of this month, I was lucky enough to visit Germany with my school for a week, hence the quiet Teen Baker July ;). We were staying in a village (Bad Munstereifel)about 90mins from Cologne (or Koln in German) and a similar distance from the German theme park Fantasialand! But, the aim of this post is to share the rather splendid joys of the Schokoladenmuseum we visited in Colgone.


Images © Raimond Spekking / CC-BY-SA-3.0 (via Wikimedia Commons)
As well as having sections of the museum devoted to showing visitors the history of chocolate, cocoa bean farming, the lives of cocoa farmers, cocoa distribution and chocolate advertising – the most interesting section was the chocolate production area which was held in the big glass rooms at the end of the huge museum (top picture). This part of the museum is partnered with Lindt chocolates, so the working machines and five foot chocolate fountain were all pouring out molten Lindt chocolate. The most famous Lindt is probably the melt-in-your-mouth truffles. Although the machines making the inner melty truffle weren’t on display for the public, the finishing stages were and were utterly mouth watering to watch and is what I want to share with you today…
GERMANYYYYY 128
Firstly, cold truffles are lined up ready to be covered in their final coating of milk chocolate…
GERMANYYYYY 129
Then they go under the mini chocolate waterfall and are covered in a whole new layer of deliciousness AKA Lindt chocolate…
GERMANYYYYY 130
Next, the truffles are rolled along this vibrating conveyor belt to “rough up” the layer…
GERMANYYYYY 131
The next conveyor belt dries and cools the truffles so that they are ready…
GERMANYYYYY 132 ..to be rolled into boxes….
GERMANYYYYY 133 and lovingly wrapped, ready for the shops!
Hope you enjoyed the photos! Next up, the cafe photos and top chocolate facts !!

Monday, 6 July 2009

Crunchy Lemon Pie?

There are so many different places to get great ideas and recipes from today. Previous generations may have had family recipes and a few cookbooks. Then came the rise of the celebrity chef – and Nigella, Jamie, Gordon et al gave us hundreds of new recipes promising to make us look like culinary gods/goddesses. Then they were TV programmes – who could resist some sumptuous fish recipe after it was shown to them by Rick Stein as he sailed through various parts of Europe/the Mediterranean cooking and eating all sots of delicacies.

Now we also have a huge variety of magazines and “Food Sections” in the papers ever month or week – providing us with more inspiration. And so the Saturday Times Weekend Section recently combined two recipe sources: by showing a readers family recipe in the food-section each week – therefore family secrets available for the nation (like blogs..?). And hence where this weeks recipe was from!

idas,zoo,cupcakes,lemon 179 It was described, in the paper, as Crunchy Lemon Pie. Really, its more a refrigerated lemon cheesecake: but HEY the most important aspect is it was delicious! Absolutely delicious! Thick and creamy lemon filling, combined with the sweet crunch of the gingernut crust – aah. Its perfect for the hot weather we have been having recently, and the summer season altogether, as you don’t need an oven and its lovely and refreshing. And all so easy! This should definitely be a new family favourite.

idas,zoo,cupcakes,lemon 185You can see just how thick and luscious it was from this photo! Some notes: although the recipe suggests 7tbsps of lemon juice and 3 lemon zests, I think I ended up using around 5 lemons? Alright they were rather small – but this dessert is best when the filling has a strong flavour and kick to it – rather than being just bland. As long as we (my Mummy and I) tasted as we went along it was good – and trust me, it will be hard NOT to taste as you go!

idas,zoo,cupcakes,lemon 184Simple, classy, flavourful, wow-factor: why are you still reading? Go make this brilliant summer dessert! Find the recipe here.